To follow this installation guide, we assume that you’ve purchased a new USB audio interface Focusrite Scarlett 18i20 Gen. 3 to use with Dataton WATCHOUT in a multi-channel setup.
The audio interface needs an initial configuration to enable all channels and to separate them into 10 analogue mono outputs. This is done with the Focusrite Control software which you can download from their website, https://focusrite.com/en/focusrite-control.
Current WATCHPAX 40 and 60 display servers (FW: r16) come with the drivers installed but not the actual control software. You can’t install it on the write-protected system and need to run it from a separate computer with Microsoft Windows or Apple OS-X. It is recommended to install the software on your WATCHOUT production computer for easy access and testing.
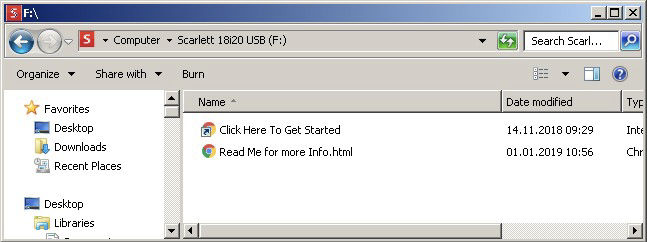
- Connect your new audio interface to a Mac or PC to configure the device, using the USB cable delivered with your audio interface. When doing so for the first time, the device will appear as a computer drive. Open the drive and click on "Click Here To Get Started" to connect to the Focusrite customer website.
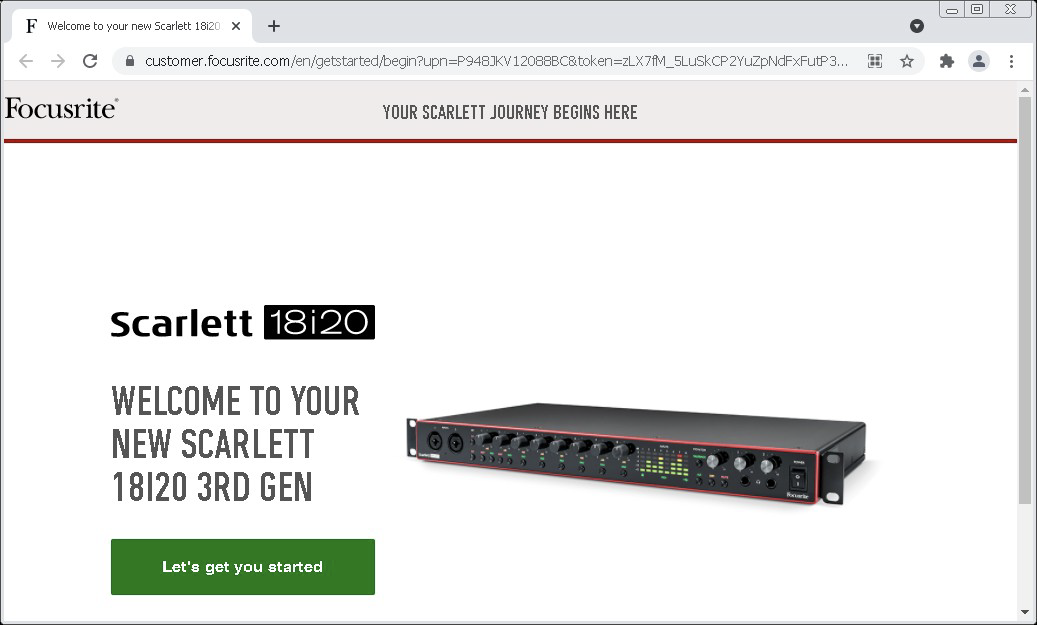
- A web page will open showing you a picture of your device. Click on the button “Let’s get you started” to continue.
- On the next page you can first create an account or continue to download the Focusrite Control software. Further down you can also register your device or just use the link at the bottom “JUST GIVE ME MY ESSENTIAL SOFTWARE”. Doing so will lead to a new page where you can download Focusrite Control for your platform.
- Follow the on-screen description and install the software which will also automatically install the necessary drivers. Upon installing the software and driver you’ll need to restart the computer.
- You’ll be routed back to the website where you can still register the product or just close the window. You’ll also be asked to restart the audio interface.
- Focusrite Control should have opened up by now and you should see the routing page for the outputs.
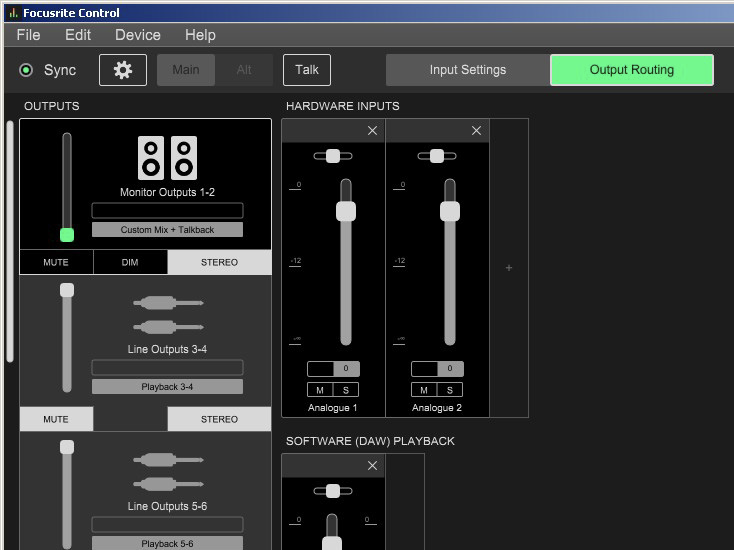
- The factory preset uses channels 1 and 2 as a stereo custom mix output and for talk back. This is usually not used for WATCHOUT and needs to be changed. The easiest way is to use the preset “Direct Routing” which you’ll find in the menu under “File”.
Beware that all 10 outputs are now defined as stereo pairs!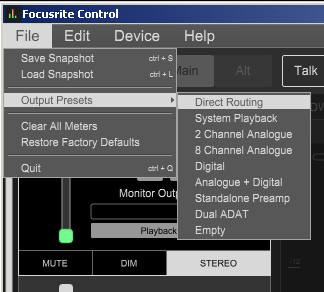
- In WATCHOUT, you’ll usually want to use 10 discrete outputs rather than 5 stereo pairs.
To achieve this, click on each button “STEREO”which will then show two discrete outputs 1 and 2. Do the same for the other 8 outputs.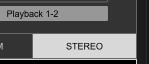
- While doing so, you might notice that some outputs are muted. In this case, just click on the “MUTE” button to unmute the channel.
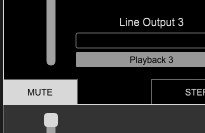
- As a last optional step, you might want to name your outputs by writing a name into the black field above those buttons.
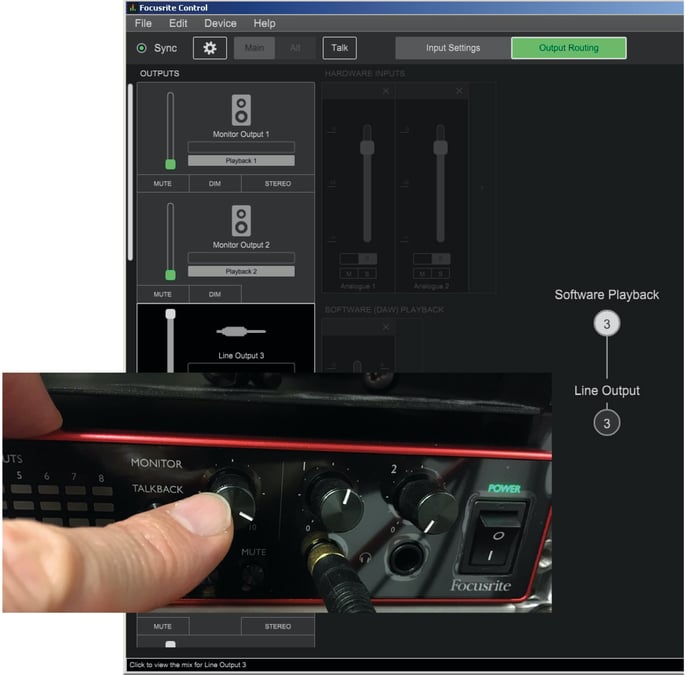
- The first two channels might show the level faders (green handles) pulled all the way down. They are physically controlled by the rotary controller on the front panel named “Monitor”. Turn this controller all the way clockwise to fade these channels up.
- This behavior can be changed on the settings page at “Monitor Controls”. If you set this to none, the monitor rotary controller won’t change the output volume anymore. If you set it to all instead, the rotary controller will influence the level of all 10 analogue channels.
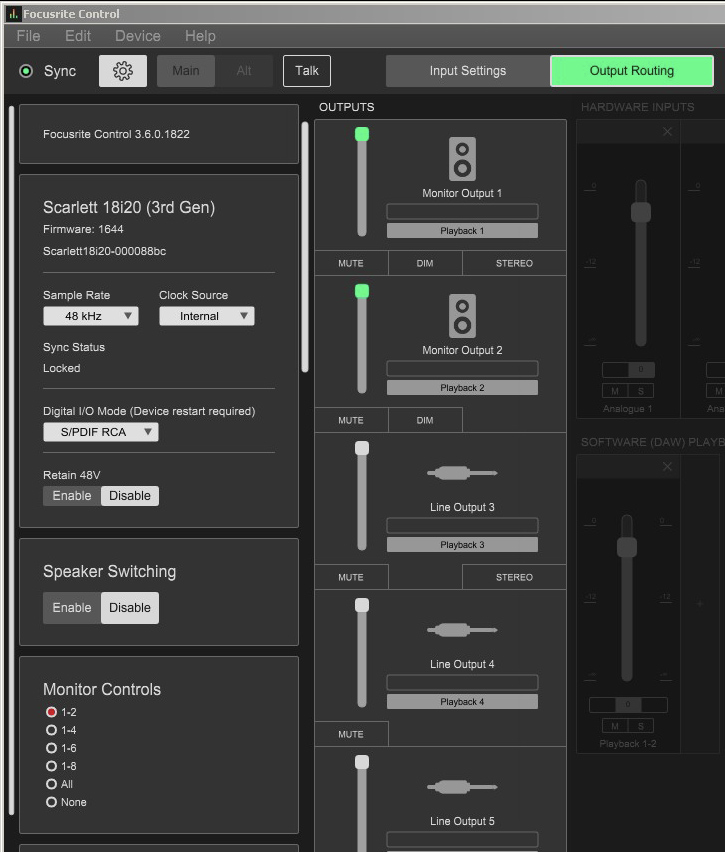
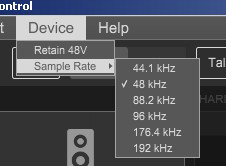
- If you need a certain sample rate, you can set this through the menu “Device > Sample Rate”. While the device will save the setting, it can automatically change to a different value when a software like WATCHOUT takes control. Therefore it needs to be double-checked later on.
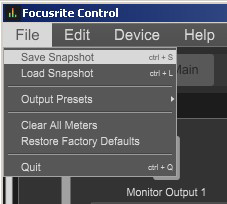
- Finally you can save your configuration in a file. This can be re-used for additional audio interfaces or if you need to change the settings for other uses than WATCHOUT. Saving and loading can be done through the menu “File > Save Snapshot”.
Testing the audio interface on the production computer
To test the functionality you can start the WATCHOUT production software on this computer and build a small show with some multichannel audio files.
- In WATCHOUT (watchmaker.exe), go to the menu “File > Preferences” and there to the “Audio” tab.

- First select the audio device “Focusrite USB ASIO [ASIO].
- Then check whether the sample rate is set to the correct value. We noticed that connecting the audio interface to WATCHOUT will switch the sample rate to 44100. You can change this by using the button “Configure…” next to the interface selector. Using this button also allows you to set the buffer size which is set to 192 by default.
Increasing the buffer size might be necessary if you hear digital cracking noises or dropouts. A side effect is that this will lead to a slightly higher audio latency. - Finally select the number of outputs you want to use. (Output Channel Limit). This setting is a global setting and applies to both playing the audio through the production computer or through a display computer!
Playing audio from your WATCHPAX
- Connect your Scarlett audio interface to one of the two USB ports on the back of your WATCHPAX while the player is off.
- Turn the player on remotely or by plugging the power cable in.
- Open your WATCHOUT project file in the production software and click into the “Stage” window to make this window active.
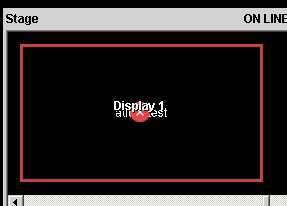
- Select a screen rectangle connected to the player, which is physically connected to the audio interface.
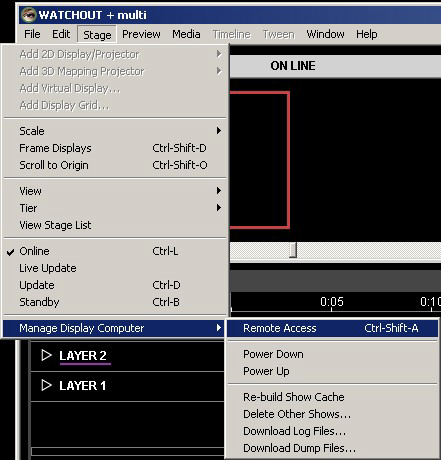
- Now either use the menu “Stage > Manage Display Computer > Remote Access” or simply use the keyboard shortcut Ctrl-Shift-A to open a remote connection to the display computer. You’ll now see the window of the display computer on your screen.
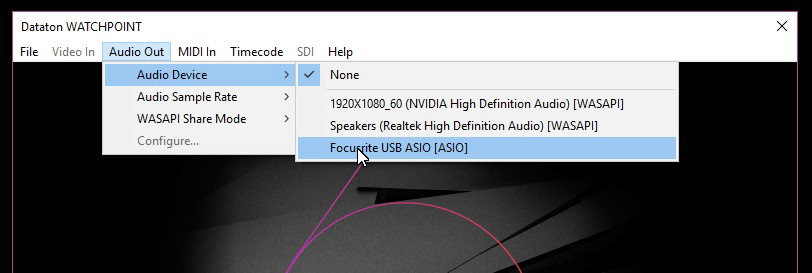
- Go to the menu “Audio Out > Audio Device” and select “Focusrite USB ASIO [ASIO].
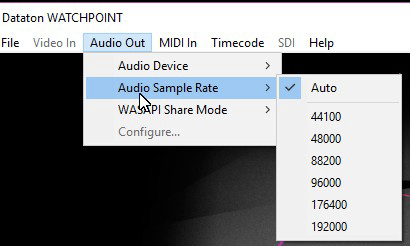
- Set the audio sample rate if you want to force the audio interface to a certain rate. Often the sample rate is reset to 44100 when you connect the sound interface to a WATCHOUT computer.
- Re-launch WATCHOUT (WATCHPOINT) through the menu “File > Re-launch”.

- All set. You can now use your Scarlett audio interface with WATCHOUT with 10 separate outputs.
HINT: 10 channels are not enough for your project? Why not add a rather cheap ADAT to analogue output interface and connect this as a subsystem to your Scarlett 18i20? We tested this with a Behringer ADA 8200 Ultragain and were able to address 18 discrete output channels on our Scarlett audio interface.
Published: July 2021
Author: mediaservice rainer beddig, Dataton Premium Partner, DACH
WATCHOUT and WATCHPAX are registered trademarks of DATATON AB. All other company and product names are trademarks or registered trademarks of their respective owners. Use of a term in this article should not be regarded as affecting the validity of any trademark.