When starting a new project/creating a new show - make sure to be smart from the start.
How to organize your media files
First of all, always organize your project in structured and logic way from the start. Make it a habit to e.g. store all the media in a way that makes the most sense.
In order to avoid ending up with missing media, make it a rule of thumb to always copy the media that you are planning to use into a known folder structure before entering them into WATCHOUT. If possible, try to avoid using media located on different hard-drives or USB sticks.
Secondly, a good practice is to always have a “Media” folder located in the same directory as the show-file (.watch file). You can then either store all media inside this folder, or even better, make sub-folders in a logic way to reflect your specific project; for example one folder for backgrounds, one for videos, one for images and one for sound. Or, if it makes more sense, create one folder for the intro, one for the first part, one for the mid part and one for the finale. Choose your structure according to the structure of your WATCHOUT project.
Thirdly, yet another good practice is to mirror the media folder structure inside the WATCHOUT media window. If you do this from the start, maintaining the structure will be easy and it will also give you a good overview of your WATCHOUT project.
Below are a few screen shots from a simple demo show that contains some videos and some still images used as backgrounds: 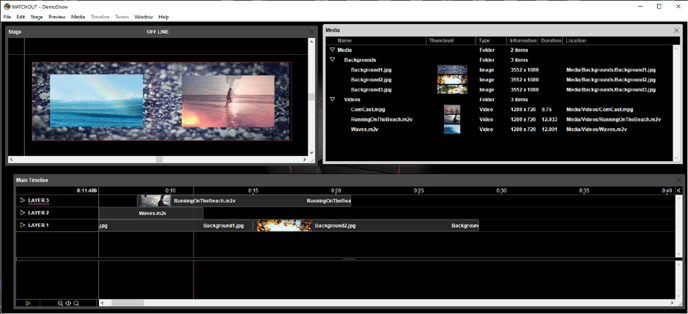
This is what the structure looks like on the hard drive:
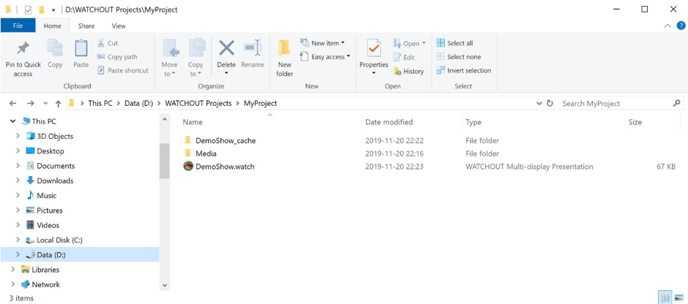
The above is the folder where the WATCHOUT show is located. The folder contains a show file named “DemoShow.watch”, a cache folder “DemoShow_cache” (automatically created) where WATCHOUT stores information to speed up the startup time, and a media folder ”Media” where the media files are stored.
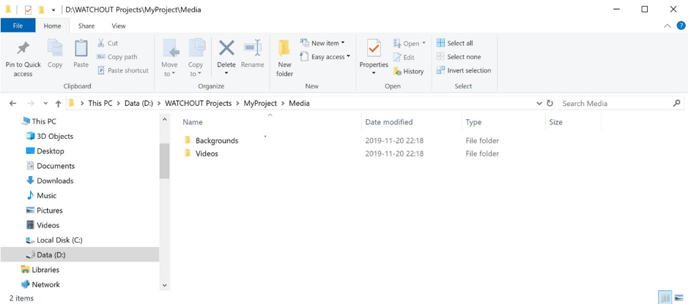
This is the Media folder:
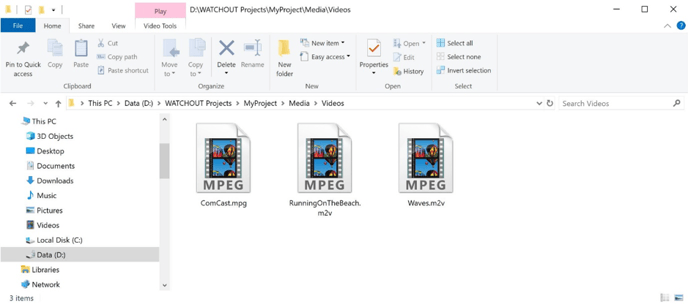
This is the folder containing the Videos:
And this is the folder containing the background images:
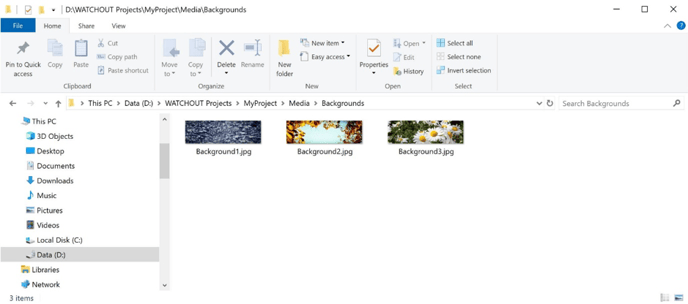
If you want to add a new background image into WATCHOUT, first copy the file into the folder for background images called “Backgrounds” on the hard drive. Then, drag-n-drop the file from the “Backgrounds” folder into the WATCHOUT media window folder with the same name.
A tip: If you copy multiple new files into a media folder on the hard-drive, for example adding five new background images to the “Backgrounds” folder, then you can add all the new files into the WATCHOUT media window by dragging the “Backgrounds” folder from the hard drive into the media window. WATCHOUT will automatically update the subfolder “Backgrounds” in the media window with the new files and keep the ones which were already there intact.
Note: To replace a file already in the WATCHOUT media window with a new version, for example an updated background image, just replace the old file with the new file in the same folder on the hard-drive and keep the name. Then press Ctrl-R (Refresh Media) to update the show with the new file.
To create a backup of the show
To make a backup of a show, use the command “Files/Consolidate to..”. This command will ask you for an empty folder to be used as the target for the consolidation of the show.
Next you get a question if you want to consolidate “Media Currently Used” or “All Media Items”.
Select the “Media Currently Used” if you are done editing your show, or if you for some reason wants to clean up your show and get rid of unused media. This option will only select the media files that are used at least once on any timeline.
OR
Select the “All Media Items” if you want to make a total backup of your show while you are still working on it. This will include all media files in the media window, regardless if they are used or not.
Press the “Copy” button to start the consolidation.
The below is what the target folder looks like after a consolidation. The “Media” folder will have the same structure as the original “Media” folder, and depending on your choice it will either contain all media files or only used media files.

You can now zip this folder and store the zip-file offline on a separate media device for safe keeping.
A good practice is to do a complete backup at least once a day when you are working on a project. If you do a lot of changes in a short period of time, it is recommended to do the consolidation even more often to be able to roll-back in case something goes wrong.
Always do a complete backup before upgrading the WATCHOUT software to a new version and store that backup offline so you have a possibility to rollback if you for some reason run into problems with the new WATCHOUT version.
How to restore from a backup
Total restore:
If you for some reason want to do a complete restore from a consolidated backup. Simply copy the zip-file with the consolidated folder into the directory you want to use. Un-zip the file and you will have a perfect starting point from the moment when you did the consolidation. Just double click on the show-file (.watch file) to start WATCHOUT or start WATCHOUT production software from the programs menu and open the show-file in the startup window.
Partial restore:
To partially restore something from your consolidated show, for example restoring a single auxiliary timeline or copy the display settings, un-zip the consolidated show to a temporary directory, open the folder and re-name the show file (.watch file) to a new name by example adding “backup” to the end of the filename. Example: “MyShowFile.watch” -> “MyShowFile_backup.watch”.
Move the “backup” show-file to the same directory where the original show-file is located. Open the backup file first by double clicking on the show-file, WATCHOUT should automatically open the file. Do the same thing with the original show-file so you end up with the two show-files open at the same time.
Go to the backup file and select what you want to restore, for example an auxiliary timeline, make a copy of the timeline by choosing it and clicking Ctrl + C. Go into the original show-file, select the task window, click Ctrl + V to paste. You should now have the copied timeline in the task window and all the original media links should be intact.
Re-linking missing files, single file:
If, after a re-load of the show an error message shows up claiming that a media file is missing, you need to manually re-link the file to the correct file stored on the hard drive. This is done by double clicking on the media file name in the Media window for the missing file in WATCHOUT.
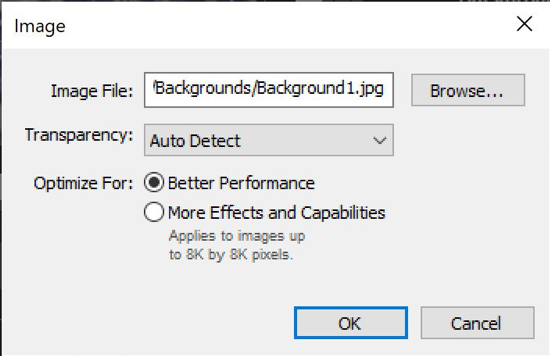
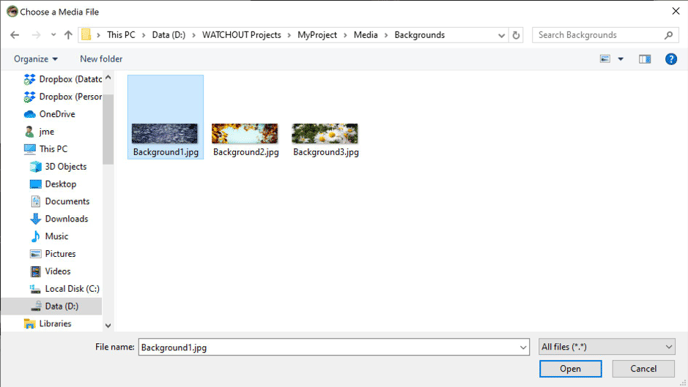
Select the “Browse” button and locate to the folder containing the correct file, select the file and press the “Open” button. Repeat this if more files are missing.
Re-linking multiple files by using Find/Replace:
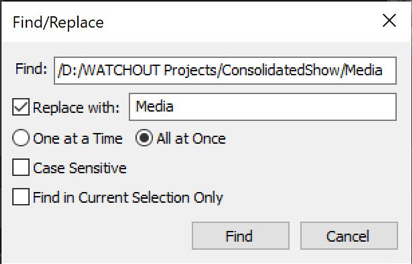
If multiple file have lost their links, it might be faster to use the “Find/Replace” function to replace the incorrect paths with correct ones. This assumes that all the files exists, but that the links to the files in the “Media” window in WATCHOUT have the wrong file-paths.
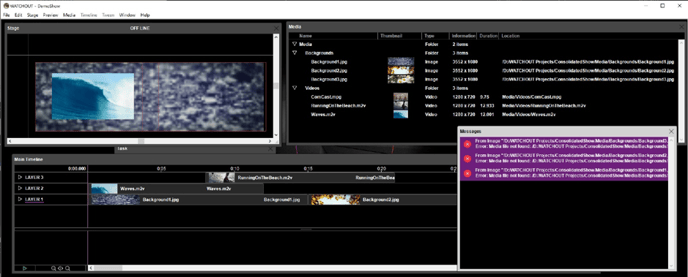
Start by selecting the “Media” window, then open the “Edit/Find/Replace” menu. Enter the incorrect path in the “Find:” field and then select the “Replace with:” and enter the correct path in that field. Select “All at Once” and press the “Find” button.
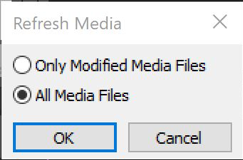
You can now test if all files have the correct path by doing a Ctrl-R (Refresh Media), select “All media” and hit the “OK” button. If there are no new errors in the Message window, then the file structure is now intact.
Last Updated: 8 jan 2020 13:30